Presprout Sugar Snap Peas: Your Guide to a Bountiful Harvest
The crisp, sweet crunch of a freshly picked sugar snap pea is one of gardening's simplest pleasures. But achieving that bountiful harvest often starts long before the first green shoot emerges from the soil. For many gardeners, the frustration of failed seeds – those that simply rot away or never sprout – can dampen enthusiasm and set back precious garden time. What if there was a simple, highly effective method to virtually guarantee your seeds will sprout, giving you a significant head start and a much more reliable yield? There is, and it's all about learning
how to presprout sugar snap peas.
Presprouting is a game-changer for cultivating robust, productive sugar snap pea plants. This straightforward technique transforms uncertain germination into a predictable success story, ensuring your valuable gardening efforts are rewarded with an abundance of these delicious pods.
Why Presprouting Sugar Snap Peas is a Game-Changer
Gardeners face a myriad of challenges, and inconsistent seed germination is certainly near the top of the list. Sugar snap peas, while generally cooperative, can sometimes be finicky, especially when soil conditions aren't perfectly aligned with their needs. This is where presprouting shines, offering several critical advantages that contribute to a more successful and satisfying growing season.
Avoiding Seed Rot and Ensuring Viability
One of the primary reasons peas fail to sprout when planted directly in the ground is seed rot. This often occurs due to fluctuating or excessively cool soil temperatures and too much moisture. When seeds sit in cold, damp soil for too long without germinating, they become vulnerable to fungal diseases and simply decompose. By taking the germination process indoors, you create a controlled environment that is ideal for sprouting. This not only significantly reduces the risk of rot but also allows you to visually confirm which seeds are viable before they ever touch the garden soil. You'll gain peace of mind knowing that every seed you plant has already proven its potential. For more insights on this benefit, check out our guide on
Stop Rotting Seeds: Presprout Sugar Snap Peas Successfully.
Optimizing Your Garden Schedule and Resources
Time is a precious commodity for any gardener. Waiting weeks for direct-sown seeds to sprout, only to find many have failed, means replanting, losing valuable growing time, and potentially missing the optimal planting window. Presprouting eliminates this guesswork. You know exactly when your seeds have germinated, allowing you to plant them at the perfect stage of development. This efficient use of time ensures your garden schedule stays on track, preventing frustrating delays and allowing for a more uniform and earlier harvest. This proactive approach is key to a truly productive season.
The Step-by-Step Guide to Presprouting Success
Achieving a high success rate with your sugar snap pea seeds doesn't require complex equipment or specialized knowledge. Our tried-and-true method is quick, easy, and has consistently delivered successful harvests twice a year for us. Here's a detailed breakdown of
how to presprout sugar snap peas effectively:
Gathering Your Simple Supplies
Before you begin, ensure you have these basic items on hand:
- Sugar Snap Pea Seeds: Choose fresh, high-quality seeds from a reputable source.
- A Small Bowl: Any clean bowl will do for initial soaking.
- Paper Towels: Use plain, unscented paper towels. Avoid ones with strong dyes or perfumes, as these could inhibit germination.
- A Plastic Bag or Covered Container: A Ziploc-style bag, a reusable food storage container with a lid, or even a plastic takeaway container works well. The goal is to create a mini-greenhouse effect to maintain humidity.
- Water: Room temperature water is ideal.
The Soaking and Wrapping Process
- Initial Soak: Begin by dropping your sugar snap pea seeds into a bowl of clean, room-temperature water. Let them soak for 2-4 hours. This initial hydration helps soften the tough seed coat, signaling to the embryo that it's time to wake up and begin the germination process. Do not soak for more than 8 hours, as prolonged soaking can lead to suffocation.
- Prepare the Paper Towel: Take a full sheet of paper towel and dampen it thoroughly. It should be moist but not dripping wet. Gently squeeze out any excess water.
- Position the Peas: Carefully place your soaked pea seeds in the middle of the damp paper towel. Ensure they are spaced out slightly, not piled on top of each other, to allow for air circulation and easier inspection later.
- The "Envelope" Fold: Fold the paper towel around the peas, creating a snug envelope. First, fold one side over the peas, then the opposite side, and finally fold the top and bottom flaps inwards. This keeps the seeds securely wrapped and maintains consistent moisture.
Nurturing Your Seeds to Sprout
- Create the Microclimate: Place the wrapped paper towel containing your pea seeds into your plastic bag or covered container. Seal it loosely or cover it to retain humidity.
- Find the Sweet Spot: Place the bag or container in a warm location, ideally between 65-75°F (18-24°C). This is the optimal temperature range for pea germination. A countertop or the top of a refrigerator often works well. Avoid direct sunlight, which can overheat the seeds.
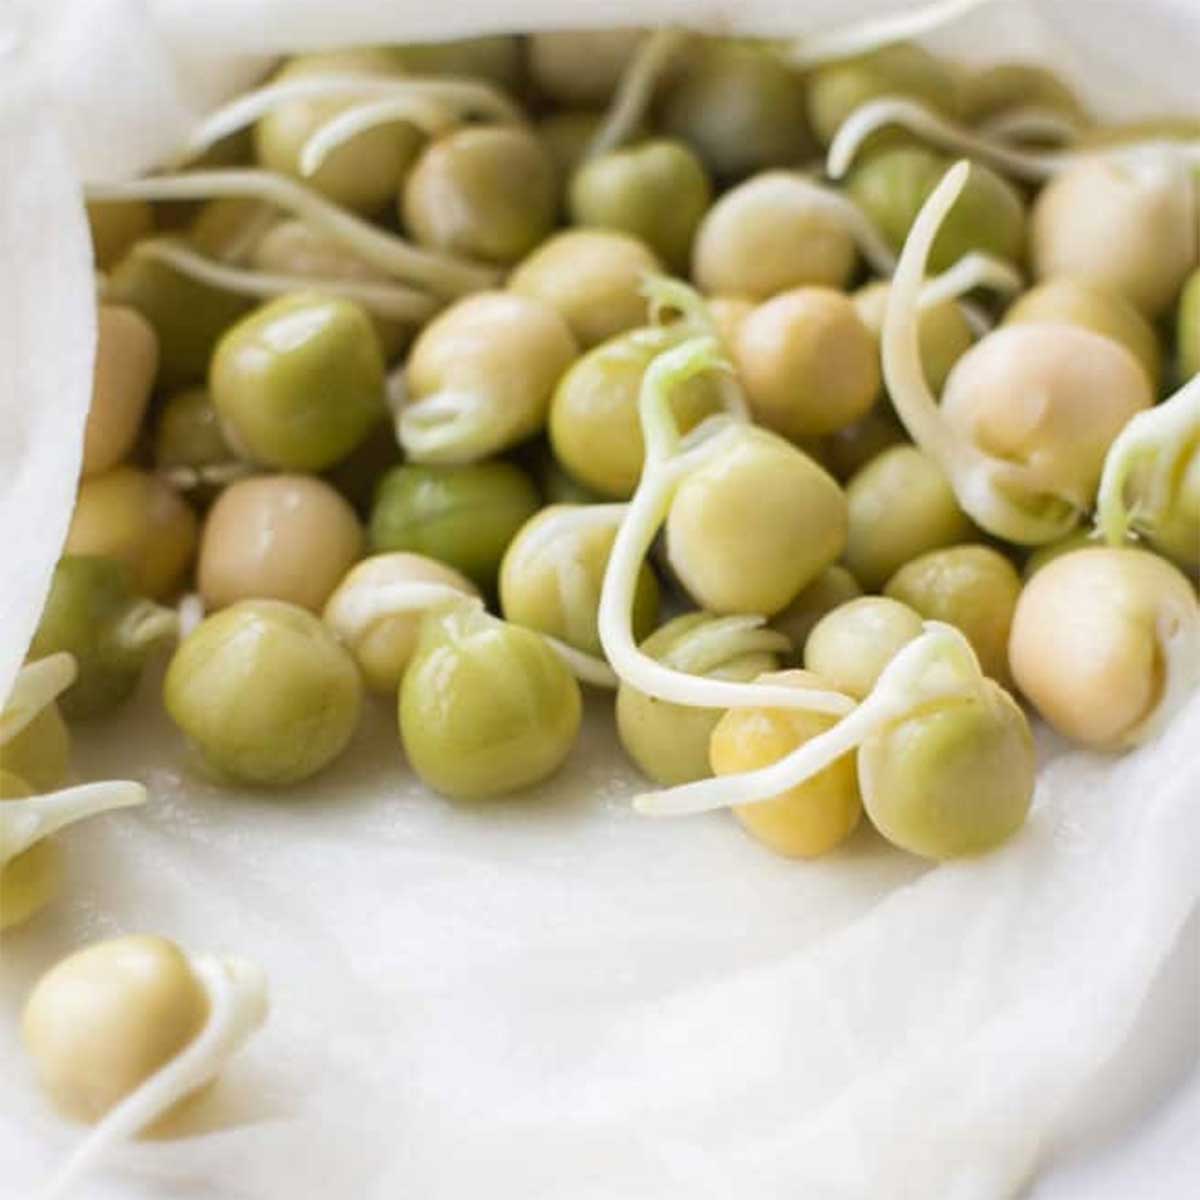
- Daily Check-in: This is crucial! Check on your peas daily, typically starting on day two or three. Gently unwrap the paper towel to inspect the seeds. You'll be looking for tiny white roots (radicles) emerging from the seeds. If the paper towel feels dry, add a few drops of water to re-dampen it. It's important to keep the environment consistently moist but never soggy.
- Patience Pays Off: Sugar snap peas typically sprout within 3-5 days using this method. Some might pop a root earlier, others a little later. Once you see a small, healthy taproot emerging – usually about 1/4 to 1/2 inch long – your peas are ready for planting! Avoid letting the roots get too long, as they become increasingly fragile and susceptible to damage during planting.
Planting Your Pre-Sprouted Peas for a Robust Harvest
With your sugar snap pea seeds successfully germinated, the next exciting step is transplanting them into your garden. This phase requires gentle handling and thoughtful preparation to ensure your efforts culminate in a truly bountiful harvest.
Preparing Your Garden Bed
Sugar snap peas thrive in well-drained soil rich in organic matter. Choose a location that receives at least 6-8 hours of direct sunlight per day. Before planting your precious sprouts:
- Amend the Soil: Work in compost or other organic matter to improve soil structure and fertility.
- Check pH: Peas prefer a slightly acidic to neutral pH (6.0-7.0).
- Install Support: Sugar snap peas are vining plants and require support to climb. Set up a trellis, netting, or stakes *before* planting. This prevents root disturbance later and provides immediate support for the young vines.
The Art of Planting
Handle your pre-sprouted peas with extreme care; their tiny roots are very delicate.
- Dig a Trench: Using a small trowel or even your finger, create a shallow trench in your prepared garden bed. A depth of about 1 inch is usually sufficient.
- Gentle Placement: Carefully place each sprouted pea into the trench, spacing them approximately 3 inches apart. Ensure the root is pointing downwards. Avoid touching the root directly if possible.
- Apply Inoculant (Optional but Recommended): For optimal growth, especially if you haven't grown peas in this spot before, consider using a pea and bean inoculant. This beneficial bacteria (Rhizobium leguminosarum) helps the pea plants fix nitrogen from the air, enhancing their vigor and overall yield. Simply sprinkle a little inoculant powder directly into the trench with the seeds before covering them. This step is a fantastic way to Guarantee Your Crop: Easy Sugar Snap Pea Presprouting Method.
- Cover and Firm: Gently cover the peas with about 1 inch of soil. Lightly press down on the soil with your hands to ensure good seed-to-soil contact.
- Initial Watering: Sprinkle the newly planted area with water immediately after planting. Keep the soil consistently moist but never waterlogged as the young plants establish themselves.
Post-Planting Care and Anticipation
Now comes the exciting wait! It usually takes about a week or even a little longer for the first shoots to break through the soil surface. This is a truly rewarding moment, signaling the start of your garden's growth. Once the first one appears, the others will quickly follow, creating a lush row of promising pea plants. Continue to provide consistent moisture, especially during dry spells, and ensure they have ample support for climbing. Before you know it, you'll be enjoying the fruits (or rather, pods!) of your labor.
Conclusion
Presprouting sugar snap peas is more than just a trick; it's a foundational technique that empowers gardeners to take control of their planting success. By ensuring optimal germination conditions, preventing seed rot, and confirming viability before planting, you set the stage for a thriving garden and an abundant harvest. This simple, hands-on method not only saves time and resources but also cultivates a deeper connection with your plants, watching them awaken and begin their journey. So, the next time you dream of those sweet, crunchy pods, remember this easy guide on
how to presprout sugar snap peas. Give it a try, and prepare to enjoy pounds of delicious sugar snap peas straight from your garden – a truly satisfying reward for your efforts, ready to be enjoyed fresh or even preserved for later delight!